Sending Multiple Emails
/Time Matters has three different ways to send one Email message to multiple people:
- Tagging Contacts
- BCC Field
- Distribution List
Each way has its own special advantages.
Note: These methods work just as well in recent versions of Time Matters as they did in 2006.
1) Sending Multiple Emails by Tagging Contacts
Tagging Contact records addresses each Email individually
This method protects the privacy of each recipient's name and Email address. Lawyers and clients have become highly sensitive to their privacy and to Spam. By using this method you can avoid offending people who do not want their Email addresses distributed.
When you send an Email to multiple people by tagging their Contact records, each person sees only his or her own Email address in the To: field. A drawback of this approach is that only the Email address is placed in the To: field without the person's first and last name. The Email seems somewhat less personal because of that, but it also appears that you sent it individually to the recipient.
Follow these steps to tag Contact records and send out the same Email message to each one.
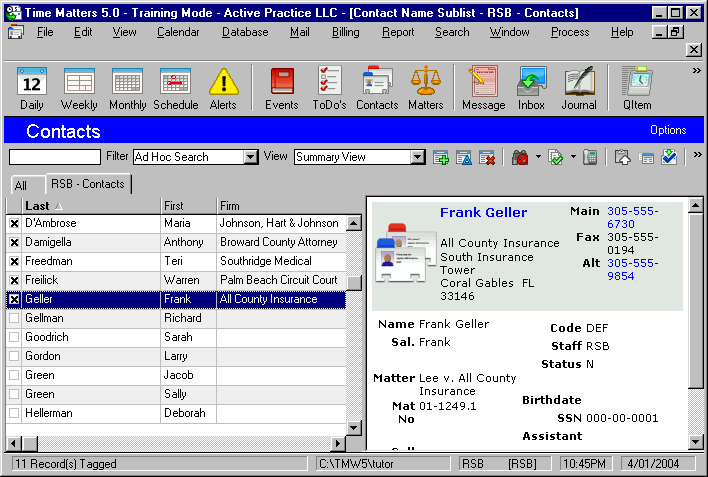
Tag the Contact records.
Using a QuickTab or Search assist you in selecting the Contact record. Then tag them individually using the mouse or all at once using Ctrl-T.

Click the drop-down button of the Process Records icon.

Choose "Send Email"

Complete the Email Message
A blank Email form appears with "" in the To: field. Fill in a Subject, optionally link it to a Contact and/or Matter, and complete the Message.

Click Send.
Managing Your Email Projects
After sending multiple Emails using this Tagging Contacts method, you will have a separate Email in the Sent Items folder for each of the recipients. We recommend saving one representative Email linked to a special Matter record used for tracking this marketing project. After linking the Email message to this Matter, uncheck the Show on Inbox checkbox in the message and click Save & Close. Then tag all the other identical Emails and delete them from Sent Items to keep your Personal Inbox from becoming clogged.
We also like to use customized User fields on the Contact form to keep track of our mailings. They are helpful for flagging the Contact records of people to whom you want to send Emails. Use a Quick Tab or a Filter to select these people from the Contact list, then press Ctrl-T to tag them all when you are ready to send them all an Email.
2) Send Multiple Email Messages Using the BCC Field
Using the BCC Field Keeps Messages Private
An advantage of this approach is that you can use a Group Name in the To: field such as "Seminar Participants." You will need to create a Contact with the name "Seminar Participants," filling in the Email address with one of your own addresses, such as info@mylawfirm.com.
A disadvantage is that some recipients may ignore Emails that are not specifically addressed to them.
Start an Email the usual way.
In the Email form, display the BCC field by clicking on View > BCC Field.
Click on the lookup button to the right of the BCC Field to select the recipients of the Email.
Fill in the To: field with the Group Name contact you created.
Complete the Email and click Send.
3) Sending Multiple Emails with a Distribution List
A Distribution List Mailing Shows All Names and Email Addresses
When each of your recipients will have no problem with his or her Email address being revealed to the other recipients, a Distribution List works well. It includes both names and Email addresses in the Send field.
Start an Email the usual way.
Click the lookup button next to the To: field.
Click on the Distribution List tab.
Click Add and then Add Contact.
Tag the Contacts that you want in the Distribution List.
Fill in a List Name (that will not appear on your Email).
Highlight the Distribution List name and click the To: button.
Now you can send an Email to everyone in the list.


